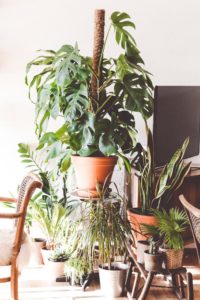
The reason why I decided to post this today is because it is something that I have been working on for a while, and I can imagine that others ave struggled with it before as well. Indoor plants, they seem like a lot of work, and for me they were until I learned what I was doing wrong.
Six factors affect plant growth:
- air,
- water,
- light,
- temperature,
- soil,
- nutrients.
Whichever of the six is will limit your plant. For example: Potting plants in the correct soil will help eliminate 90% of problems a plant may experience.
Give your plants the right soil, and you position them to thrive and reach their full genetic potential. The right soil will yield healthy roots, which in turn yields a healthy plant.
Succulents
For succulents, water, light, and temperature are pretty well understood. For example, we all know a succulent without enough light will stretch (called etiolation). Obviously, it’s seeking more light. But what we might not know is that behind the scenes, the plant is putting extra energy into stretching. This could lower the plant’s immune system, making it more prone to pests and infection.
So where do we start when trying to provide our succulents with a better environment where they will not only survive, but thrive?
It Is In The Dirt
A plant’s roots play a role in receiving all but one of the six elements: light.
One particularly important but often neglected element, here, is air. Roots need oxygen and airflow as much as they need water. This is why root rot happens. It’s not because of too much water, but rather because water can cause a lack of oxygen to the roots.
Think about this for a moment; if water were the issue, how could plants and even succulents grow hydroponically?
They could not.
They water needs to have oxygen in it for them to develop a healthy root system.
Air is the reason why a gritty mix is so good for plants.
It is a potting medium that, when done correctly, completely eliminates the issue of “overwatering” by eliminating the layer of water at the bottom of the pot that suffocates the finer roots – the ones that do the most work in getting your plants water and nutrients.
Drainage
The most important aspect of a container is a drainage hole.
This is non-negotiable if a plant is to survive for than a few months. A pot without a drainage hole nullifies all the advice above. Even with a gritty mix, it is impossible to keep a plant healthy without a drainage hole.
A plant in a container with no drainage hole will either be under watered due and experience fertilizer burn due to watering in sips, or conversely over watered with its roots sitting in water.
If you would like to have your plant in a container that is not perfectly suitable for plants, such as a cute ceramic planter with no holes, an old shoe, or a glass terrarium, use a cachepot.
That is, use a normal pot with drainage holes and simply take out the plant to water it.
When finished watering, put the cachepot back into your other container.
Fear of Watering/Overwatering
A common piece of advice you’ll here with succulents is to not overwater them. Unfortunately, this advice usually leads to people watering their plant in sips, which has its own set of issues, which I will explain in a later section.
Instead of soil, people are often taught that better drainage is the solution, especially for succulents. The natural reaction then, is to use a sandy mix, to add rocks, or to add a drainage layer.
Unfortunately, these are not good solutions.
Sand is very fine and will cause water to perch even more. Rocks added to a soil won’t do anything if the soil still contains over 60% its original medium.
But perhaps the most interesting one is the drainage layer.
Beginner’s guide to watering:
- Prepare the water by adding a 3-1-2 fertilizer at half the recommended dosage from the container’s instructions.
- Water until excess comes out the bottom of the pot’s hole(s).
- Discard the excess water immediately. Avoid letting the plant sit in the water to reabsorb.
PWT Height
The layer of water that forms at the bottom of a pot is called a perched water table, abbreviated
PWT.
A PWT is the saturation point where capillary action in the soil equals the force of gravity. In other words, at a certain height, water won’t drain anymore.
Remember that a particular growing medium has a particular PWT height.
The height correlates to the size of the growing medium’s particles. Adding a layer of large rocks underneath organic potting soil actually raises the PWT, reducing the space your plant has to take up air. In other words, it’s as if you’ve just shortened your pot. Crazy, right?
If you want to experiment with a PWT and have a plant potted in organic potting soil, you can water it and let the water stop flowing out. Then, with your plant over the sink, lower it slowly and jerk the pot upward.
All that excess water that drains out – that’s the PWT.
If your plant needs to be potted up, do so carefully or consider repotting it. And unless the roots have noticable issues, do not trim the roots. There is a common misunderstanding that when you repot your plant it should also be trimmed. This is false. Never trim roots unless you find there is something fundamentally wrong with it; plants don’t like their feet being chopped off.
One-Plant-One-Pot Potting
I have also started to do a
one-plant-one-pot method, as it allows you to tailor each plant’s water, fertilizer, and light needs.
So it’s useful to be able to move individual plants around as the lighting changes. And even something like two identical Haworthias can have slightly different light needs, if one is older or younger.
It just gives you more flexibility.
~XO